Summarize this blog post with:


Quick Summary
Discover how to migrate from Wix to WordPress in 2027 with this complete step-by-step guide. Learn about the benefits of switching platforms, content and media transfer, WordPress hosting, design rebuilding and essential SEO settings to ensure a smooth migration.
This guide covers the complete Wix to WordPress migration process, including URL redirects, ranking protection, common migration challenges and post-launch maintenance. Explore practical tips to preserve website traffic, prevent data loss and build a flexible, SEO-friendly WordPress website for long-term business growth
- Key Takeaways
- Wix to WordPress Migration: A Complete Step-by-Step Guide for 2027
- What Is Wix to WordPress Migration?
- ✧ What the migration process includes
- ✧ What content can be transferred
- ✧ DIY migration or professional Wix to WordPress migration services?
- Why Should You Migrate from Wix to WordPress?
- ✧ Greater Website Customisation and Flexibility
- ✧ Better Control Over SEO Settings
- ✧ Access to WordPress Plugins and Integrations
- ✧ Improved Website Scalability
- ✧ More Control Over Hosting and Data
- What to Consider Before Migrating from Wix to WordPress
- ✧ Review existing website content
- ✧ Check SEO rankings and traffic
- ✧ Choose WordPress hosting
- ✧ Back up important content
- ✧ Plan URL redirects
- ✧ Set a migration timeline
- How to Migrate from Wix to WordPress: Step-by-Step Guide
- Step 1: Review and Back Up Your Wix Website
- Step 2: Choose a WordPress Hosting Provider
- Step 3: Install and Configure WordPress
- Step 4: Select a WordPress Theme
- Step 5: Transfer Wix Pages and Content
- Step 6: Migrate Wix Blog Posts
- Step 7: Transfer Images and Media
- Step 8: Configure WordPress SEO Settings
- Step 9: Set Up 301 Redirects
- Step 10: Test and Launch Your WordPress Website
- How to Maintain SEO Rankings During Wix to WordPress Migration
- ✧ Preserve Important URLs
- ✧ Retain SEO Titles and Meta Descriptions
- ✧ Implement Proper 301 Redirects
- ✧ Update Internal Links and XML Sitemaps
- ✧ Monitor Google Search Console
- Common Wix to WordPress Migration Challenges and Solutions
- ✧ Missing content
- ✧ Design issues
- ✧ Broken links
- ✧ SEO fluctuations
- ✧ Plugin issues
- ✧ Website downtime
- What to Do After Wix to WordPress Migration
- ✧ Submit the updated XML sitemap
- ✧ Check indexing and crawl errors
- ✧ Monitor traffic and rankings
- ✧ Test forms and integrations
- ✧ Set up regular backups
- ✧ Check website speed and performance
- Ready to Migrate Your Wix Website to WordPress?
Wix to WordPress Migration: A Complete Step-by-Step Guide for 2027
A Wix to WordPress migration is one of the most common platform moves for growing businesses. A Wix site is quick to launch, but many companies reach a point where they need more control over SEO, integrations, hosting and long-term growth than a closed website builder can offer.
The numbers explain why so many businesses end up on WordPress. According to W3Techs data from November 2026, WordPress powers 38.6% of all websites and holds a 57.6% share of sites that use a known content management system. Wix sits at 4.2% of all websites.
That gap matters to decision-makers. A larger platform means a bigger pool of developers, themes, plugins and support options, which lowers the cost and risk of growing the site over time.
The challenge is that Wix does not make leaving easy. Wix states in its help documentation that a Wix site needs to be hosted and operated on Wix’s servers, so there is no single export file that recreates your site elsewhere.
This is why many companies work with a WordPress development agency in India or a local specialist instead of attempting the move alone. A planned Wix migration to WordPress protects content, rankings and leads, while an unplanned one can quietly erase years of search visibility.
Before you start, you should know three things. Your design will be rebuilt rather than copied, some content will move automatically while the rest moves by hand, and your SEO depends almost entirely on how well you handle URLs and redirects.
This Wix to WordPress migration guide covers what the migration includes, why businesses make the switch, what to plan before you begin, a ten-step Wix to WordPress migration process, how to protect rankings, the most common problems and their fixes, and what to do after launch.
What Is Wix to WordPress Migration?
Wix to WordPress migration is the process of moving a website’s content, structure, media and search settings from the Wix website builder to a WordPress installation that you control.
In most business projects this means self-hosted WordPress (the open-source software from WordPress.org) running on a hosting account in your company’s name. Some smaller sites move to the hosted WordPress.com service instead, which trades some flexibility for convenience.
✧ What the migration process includes
A complete Wix to WordPress migration is more than copying text. It usually covers hosting setup, WordPress installation, theme selection or custom design, content transfer, media transfer, SEO configuration, redirects, form and integration rebuilding, testing and the final domain switch.
Each of these stages has its own risks. Missing one, such as redirects or form notifications, is often only discovered weeks later when traffic or enquiries fall.
✧ What content can be transferred
Because Wix is a closed platform, different types of content move in different ways. Some can be imported with tools, some must be copied manually, and some features must be rebuilt using WordPress plugins.
The table below summarises the typical transfer route for each content type, so you can estimate effort before you commit to a timeline.
| Content Type | Typical Transfer Route | Effort Level |
|---|---|---|
| Blog posts | RSS feed import on older Wix blogs, an importer tool, or manual copy for newer blogs | Low to medium |
| Static pages (Home, About, Services) | WordPress.com Wix importer or manual recreation in the block editor or a page builder | Medium |
| Images and files | Download from Wix Media Manager and upload to the WordPress Media Library | Medium |
| Design and layout | Rebuilt with a WordPress theme or a custom theme | Medium to high |
| SEO titles, meta descriptions, URLs | Recorded from Wix and re-entered through an SEO plugin | Medium |
| Forms, bookings, stores, member areas | Rebuilt with WordPress plugins such as form builders, booking tools or WooCommerce | High |
Once you know which items fall into the high-effort rows, you can decide whether to handle the move internally or bring in a Wix to WordPress migration service for the complex parts.
✧ DIY migration or professional Wix to WordPress migration services?
A business with a small site, a handful of blog posts and an in-house web person can often handle a Wix migration to WordPress internally. The main costs are staff time and the risk of missed steps.
Larger sites, online stores, booking systems and sites that depend on organic leads usually benefit from professional Wix to WordPress migration services. The fee pays for planning, redirect mapping, testing and post-launch monitoring, which is where most of the risk sits.
Many companies in the US, UK, Australia and the Middle East outsource this work to a WordPress development agency in India to access experienced teams and flexible engagement models. When comparing the top WordPress development companies in India or anywhere else, ask each candidate to explain how it handles URL mapping and testing, because process quality matters more than location.
Why Should You Migrate from Wix to WordPress?
Most businesses do not leave Wix because it is a poor tool. They leave because the business has outgrown what a hosted website builder was designed to do. The reasons below are the ones that come up most often in migration planning meetings.
✧ Greater Website Customisation and Flexibility
Wix gives you a visual editor and a set of templates, but you work within the limits Wix sets. You cannot edit the underlying code freely, and complex layouts often require workarounds.
WordPress is open-source software. Your developers can modify themes, create custom post types, build custom blocks and change how any part of the site behaves.
For a business, this flexibility shows up in practical ways. A manufacturer can build a filterable product catalogue, a consultancy can create a resource library with gated downloads, and a multi-location company can manage location pages from one structured template.
The trade-off is responsibility. More freedom means someone needs to own design standards, code quality and updates, either in-house or through a development partner.
✧ Better Control Over SEO Settings
Wix includes solid basic SEO tools, but you are limited to the settings the platform exposes. Some technical changes, such as fine control over URL structures or server-level rules, are not available.
WordPress, combined with an SEO plugin such as Yoast SEO or Rank Math, gives you control over titles, meta descriptions, canonical tags, schema markup, robots directives and XML sitemaps at page level.
You can also set clean permalink structures, which lines up with Google’s URL structure guidance recommending simple, descriptive URLs.
For companies that rely on organic search for leads, this level of control makes it easier to fix technical issues quickly instead of waiting for a platform update.
✧ Access to WordPress Plugins and Integrations
The WordPress plugin directory lists over 79,000 free plugins, and thousands more are sold by commercial developers.
This ecosystem covers almost every business need: CRM connections, marketing automation, multilingual content, advanced forms, membership systems, learning management, e-commerce and analytics.
Wix has its own app market, but the range is narrower. When a business needs to connect its website to an ERP, a sales platform or a custom internal tool, WordPress usually offers either an existing plugin or a clear path for custom development.
The key business benefit is speed. New capabilities can often be added in days with a tested plugin rather than months of custom work.
✧ Improved Website Scalability
As a company grows, its website tends to grow with it: more service pages, more blog content, more landing pages for campaigns and more locations or languages.
WordPress handles large content libraries well, from small business sites to major publishers. Performance depends on hosting, caching and code quality, all of which you can upgrade independently as traffic increases.
Working with an experienced WordPress web development company in India can help growing businesses plan this structure from the start, so the site scales without needing another rebuild in two or three years.
Scalability also covers people. WordPress supports multiple user roles, editorial workflows and permissions, which matters when marketing, sales and HR teams all publish content.
✧ More Control Over Hosting and Data
On Wix, hosting is bundled with the platform. You cannot choose your server location, move to a faster provider or take a full copy of the site files with you.
With self-hosted WordPress, you choose the hosting provider, server region, backup schedule and security setup. Your database and files can be downloaded at any time.
This ownership reduces platform risk. If pricing changes or performance falls, you can move to another host without rebuilding the website again.
For businesses with data-handling obligations, choosing where data is stored and who can access it also makes compliance conversations simpler.
Also read: How Much Does WordPress Maintenance Cost in India in 2027?
What to Consider Before Migrating from Wix to WordPress
The quality of a migration is mostly decided before any content moves. A short planning phase prevents most of the problems that appear after launch.
✧ Review existing website content
Create a full inventory of every page, blog post, product, image and downloadable file on your Wix site. A spreadsheet with URL, title, content type and owner works well.
This inventory is the foundation of the whole Wix to WordPress content migration, because it tells you exactly what must exist on the new site before launch.
Use this review to decide what to keep, update, merge or retire. Moving outdated or thin pages to a new platform only carries old problems forward.
✧ Check SEO rankings and traffic
Export performance data from Google Search Console and your analytics tool before you start. Record which pages bring the most organic traffic, leads and backlinks.
These high-value pages need the most care during migration. They are the first URLs to map, the first to test and the first to monitor after launch.
✧ Choose WordPress hosting
Hosting affects speed, security and uptime. Confirm that the provider meets the official WordPress requirements, which recommend PHP 8.3 or newer, MySQL 8.4 or MariaDB 10.11 or newer, and HTTPS support.
For most business sites, managed WordPress hosting with daily backups, staging environments and server-level caching is worth the extra monthly cost.
✧ Back up important content
Since Wix does not offer a full-site export, your backup is a collection of files: text documents, downloaded images, exported form submissions, contact lists, product data and screenshots of key pages.
Store these in a shared drive that the project team can access. Screenshots are especially useful later when you need to check that layouts and content match.
✧ Plan URL redirects
Wix and WordPress structure URLs differently. Blog posts on Wix commonly sit under a /post/ path, while WordPress uses whatever permalink pattern you choose.
Every old URL that changes needs a planned redirect to its new equivalent. This plan should be finished before launch, not written afterwards.
✧ Set a migration timeline
A small brochure site of 10 to 20 pages may take a few weeks. A site with hundreds of blog posts, a store or custom features can take two to three months.
Avoid launching during your busiest sales period. Build in time for review, testing and fixes, and keep your Wix plan active until the new site is stable.
Decide who owns each part of the project
Assign a named owner for content, design, SEO, technical setup and final sign-off. Migrations stall when everyone assumes someone else is checking redirects or rewriting outdated pages.
If you plan to hire a WordPress web development company in India or a local agency, agree the scope in writing: which pages are rebuilt, which content is copied, how many redirects are included and how long post-launch support lasts.
A written scope also makes proposals easier to compare. Two quotes for the same Wix to WordPress migration process can differ widely simply because one includes SEO checks and redirect testing and the other does not.
Estimate the budget realistically
The main cost drivers are the number of pages and posts, the amount of custom design, the features that must be rebuilt (forms, bookings, stores or member areas) and the depth of SEO work included.
Running costs change too. You will pay for hosting, premium plugins or themes and maintenance instead of a Wix subscription, so compare the total yearly cost rather than monthly plan prices alone.
Avoid choosing a partner on price alone. Even the best WordPress development company in India or elsewhere cannot protect your rankings if the budget leaves no room for redirect mapping and testing.
How to Migrate from Wix to WordPress: Step-by-Step Guide
The following Wix to WordPress migration steps reflect the order most professional teams use. Following them in sequence keeps the old site live while the new site is built and tested in the background.
Skipping or reordering Wix to WordPress migration steps is the most common cause of avoidable problems. For example, setting up redirects before the final URL structure is agreed usually means doing the work twice.
Step 1: Review and Back Up Your Wix Website
Save pages, posts and images
Start by saving a complete copy of everything you plan to move. Copy page text into documents, download images from the Wix Media Manager and export any data Wix allows, such as contacts, form submissions and store products.
Take full-page screenshots of every important page. These act as a visual reference when your designer rebuilds layouts in WordPress.
Record existing URLs
Build a list of every live URL on your Wix site. You can gather them from your Wix sitemap, Google Search Console and an SEO crawler such as Screaming Frog.
Add columns for page title, meta description, monthly traffic and backlinks. This sheet becomes your redirect map and your SEO checklist in later steps.
Step 2: Choose a WordPress Hosting Provider
Compare hosting options
Shared hosting is the cheapest option but can slow down under load. Managed WordPress hosting costs more, yet includes performance tuning, security monitoring, automatic backups and expert support.
When comparing providers, check server locations near your customers, uptime commitments, backup retention, staging tools and the quality of support. The lowest price is rarely the lowest total cost once downtime and slow pages are counted.
Set up hosting and domain
Create the hosting account in your company’s name, not an individual’s. Build the new site on a temporary domain or staging URL so your Wix site stays live during the project.
If your domain was bought through Wix, you can keep it there and update DNS records at launch, or transfer it to a registrar of your choice. Plan the switch for a low-traffic period.
Step 3: Install and Configure WordPress
Install WordPress
Most hosts offer one-click WordPress installation. Choose a secure admin username, a strong password and enable two-factor authentication from day one.
Install an SSL certificate so the site runs on HTTPS. Most managed hosts provide a free certificate automatically.
Configure basic settings
Set the site title, tagline, time zone and language under Settings. Discourage search engines from indexing the staging site until launch, and remember to switch this off when you go live.
Add only essential plugins at this stage: security, backups, caching and an SEO plugin. Keeping the plugin list lean makes testing simpler and the site faster.
Step 4: Select a WordPress Theme
Choose a responsive theme
Your theme controls how the site looks and loads. Pick a lightweight, well-supported theme that works with the block editor, or commission a custom theme if your brand needs a unique design.
Check reviews, update frequency and performance before committing. A heavy theme with dozens of built-in features often slows the site more than it helps.
Recreate website design
Use your screenshots to rebuild headers, footers, menus and key templates. Many businesses treat this as a chance to improve navigation and conversion paths rather than copying the Wix layout exactly.
A WordPress web development company in India or any experienced design team will usually create a small design system at this point: reusable blocks for headings, buttons, testimonials and calls-to-action. This keeps new pages consistent long after launch.
Keep brand colours, fonts and logos consistent so returning visitors recognise the site. Major design changes are best tested with a few real users before launch.
Step 5: Transfer Wix Pages and Content
Move text and pages
Static pages such as Home, About, Services and Contact are usually recreated manually. On WordPress.com, the Wix importer can bring over pages, images, menus and the site title, though the design still needs rebuilding.
For self-hosted WordPress, paste content into the block editor or your page builder and rebuild each section. This is also the right moment to tighten copy and update outdated information.
Treat Wix to WordPress content migration as an editorial task as well as a technical one. Assign someone to proofread each moved page against the original, checking headings, prices, contact details and calls-to-action.
Update formatting and links
Text copied from Wix often carries extra spacing or inline styles. Clean these up so headings use proper H2 and H3 tags and paragraphs are consistent.
Update every internal link to point to the new WordPress URLs. Relying on redirects for internal links slows pages and wastes crawl budget.
Step 6: Migrate Wix Blog Posts
Import available blog content
Older Wix blogs expose an RSS feed, usually at /blog-feed.xml or /feed.xml. Namecheap notes this method works mainly with older Wix blog versions, because newer blogs no longer include the feed by default.
If a feed is available, save it as an XML file and import it through Tools, then Import, using the RSS importer in WordPress. For newer blogs, an importer plugin or manual migration is usually required.
Check posts and formatting
Imported posts often need cleanup. Check headings, lists, embedded videos, author names, publish dates, categories and tags.
Pay attention to images inside posts. After an RSS import, images may still load from Wix servers, which will break once your Wix plan ends, so they must be moved into the WordPress Media Library.
Step 7: Transfer Images and Media
Upload images and files
Download original, high-quality images from Wix and upload them to WordPress. Rename files with descriptive names before uploading, for example “industrial-pump-installation.jpg” rather than “IMG_2041.jpg”.
Compress images and serve modern formats such as WebP where possible. Large images are one of the most common causes of slow pages after a migration.
Update image URLs and alt text
Replace any image links that still point to Wix with the new WordPress Media Library URLs. A search-and-replace plugin can help on large sites.
Add or carry over alt text for every meaningful image. Alt text supports accessibility and helps search engines understand your visual content.
Step 8: Configure WordPress SEO Settings
Add SEO titles and descriptions
Use the URL sheet from Step 1 to re-enter every SEO title and meta description through your SEO plugin. Pages that ranked well on Wix should keep their proven titles unless there is a clear reason to change them.
Add structured data where relevant, such as Organization, LocalBusiness, Article or Product schema. Most SEO plugins handle the common types automatically.
Set permalinks and sitemap
Under Settings, then Permalinks, choose a clean structure such as “Post name”. Where possible, match old Wix slugs so fewer redirects are needed.
WordPress generates an XML sitemap by default, and SEO plugins provide more detailed versions. Confirm the sitemap lists only pages you want indexed.
Step 9: Set Up 301 Redirects
Redirect old URLs
A 301 redirect tells browsers and search engines that a page has moved permanently. Google’s redirect documentation describes permanent server-side redirects as the best way to make sure users and Search reach the correct page.
Map each old Wix URL to its closest new equivalent, then add the rules through a redirect plugin or your server configuration. Avoid redirecting many unrelated pages to the homepage, which Google advises against.
This is the step where many DIY projects lose rankings, and where the best WordPress development company in India or any experienced migration team earns its fee: by testing every redirect against the original URL list rather than relying on a sample.
Redirect work is also where a clear Wix to WordPress migration process pays off. When the URL sheet from Step 1 is complete, writing and testing the redirect rules becomes a methodical task instead of guesswork.
Check for broken links
Run a crawler on the staging site to find 404 errors, redirect chains and links that still point to Wix. Fix each one before launch.
Redirect chains, where one URL redirects to another and then another, slow pages and dilute signals. Point every old URL straight to its final destination.
Step 10: Test and Launch Your WordPress Website
Test pages, forms and links
Click through every page, menu item and call-to-action. Submit every form and confirm that notifications reach the right inbox and any CRM connection receives the data.
Test tracking codes, cookie banners, booking tools and payment flows. Ask someone outside the project team to complete key user journeys, since fresh eyes catch problems faster.
Check mobile responsiveness
Most visitors browse on mobile devices. Test the site on several phones and tablets, checking menus, buttons, forms and image sizes.
Measure speed with PageSpeed Insights. The Core Web Vitals targets are a Largest Contentful Paint of 2.5 seconds or less, an Interaction to Next Paint of 200 milliseconds or less and a Cumulative Layout Shift of 0.1 or less.
Launch the website
Point your domain to the new host by updating DNS records. Remove the “discourage search engines” setting, confirm HTTPS works across the whole site and test redirects on the live domain.
Keep your Wix plan active for a few weeks as a fallback and reference. Cancel it only after you are confident all content, media and data have moved.
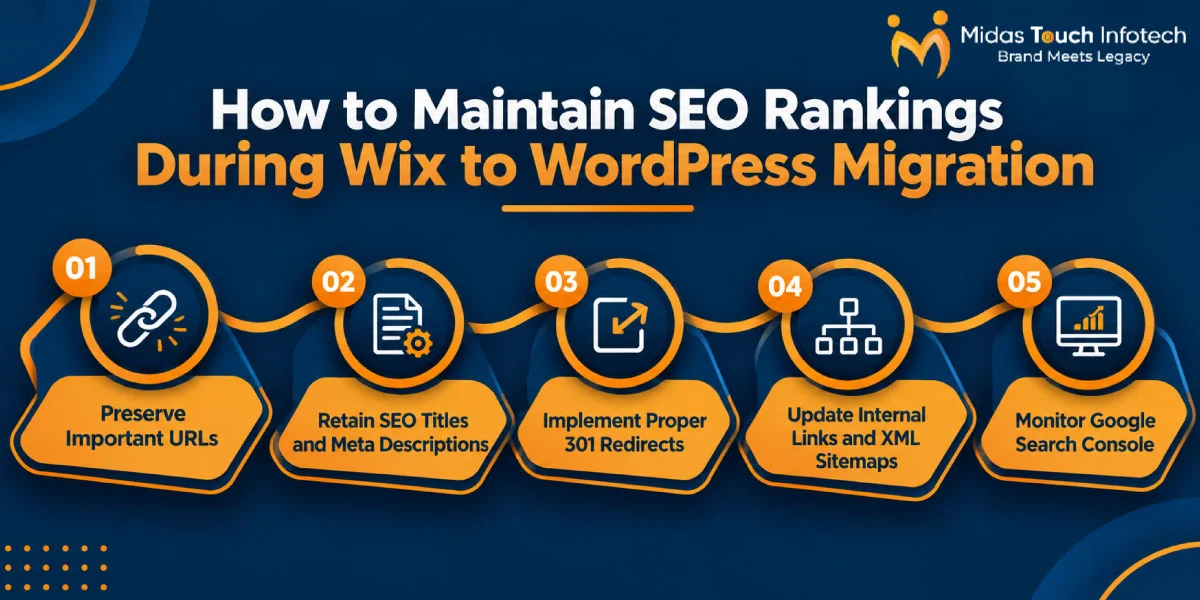
How to Maintain SEO Rankings During Wix to WordPress Migration
Protecting search visibility is the part of any Wix to WordPress migration guide that deserves the most attention, because lost rankings take far longer to rebuild than pages. Search engines need time to understand that your site has moved. Google’s site move guidance notes that rankings may fluctuate during a move, and that medium-sized sites can take a few weeks or more for new URLs to replace old ones.
The aim is not to avoid every fluctuation but to keep it short and recover fully. These five practices make the biggest difference.
✧ Preserve Important URLs
The safest URL is the one that does not change. Wherever WordPress allows, keep the same slugs for your highest-traffic pages.
For example, if a service page lives at /website-design on Wix, create it at /website-design in WordPress. The page keeps its address, and no redirect is needed.
Blog posts usually need new URLs because of the Wix /post/ prefix. Accept this, but make sure every post has a matching redirect.
✧ Retain SEO Titles and Meta Descriptions
Titles and meta descriptions that already earn clicks should move across unchanged. Changing the platform and the on-page signals at the same time makes it hard to tell what caused a ranking change.
If you plan to rewrite titles for better targeting, do it a few weeks after launch, once rankings have settled. Then you can measure the effect of each change separately.
✧ Implement Proper 301 Redirects
Google recommends server-side permanent redirects and states that they do not cause a loss in PageRank. Its site move guide also advises keeping redirects in place for at least one year.
Do not remove redirects once traffic looks stable. Backlinks from other websites will keep pointing to the old Wix URLs for years, and those links only pass value while the redirects stay active.
✧ Update Internal Links and XML Sitemaps
Every internal link should point directly to the final WordPress URL. Update menus, footers, buttons and links inside blog content.
Submit the new XML sitemap in Google Search Console. Google suggests temporarily keeping a sitemap of old URLs as well, which helps search engines find and process the redirects faster.
✧ Monitor Google Search Console
Check Search Console daily during the first two weeks and weekly for the next two months. Watch the Pages report for indexing problems, the Sitemaps report for errors and the Performance report for changes in clicks and impressions.
If your project was handled by the best WordPress development company in India or a local agency, ask them to share these reports with you during the first month. A good partner will already be watching them.
Pay special attention to “Not found (404)” errors. Each one points to a missing redirect or a broken link that should be fixed quickly.
Common Wix to WordPress Migration Challenges and Solutions
Even well-planned projects run into problems. Knowing the common ones in advance lets you build the fixes into your plan.
✧ Missing content
Pages, posts or sections sometimes fail to transfer, especially content in Wix-specific widgets, lightboxes, tabs or dynamic pages.
This is the most frequent Wix to WordPress content migration problem, and it is usually found by customers rather than the project team. The fix is to compare the new site against your content inventory line by line. Mark each item as moved and checked, and assign anything missing to a named person.
✧ Design issues
Layouts rarely look identical after a rebuild. Spacing, font sizes and image crops can differ between platforms, particularly on mobile.
Use your screenshots as a reference, adjust theme settings and custom CSS, and accept that a WordPress theme will not reproduce your Wix design pixel for pixel. Focus on brand consistency and usability rather than exact copies.
✧ Broken links
Broken links appear when internal links, buttons or embedded content still point to old Wix addresses.
Run a full crawl before and after launch, fix internal links at the source and add redirects for any old URLs that external sites link to.
✧ SEO fluctuations
Short-term ranking movement is normal after any platform change. Larger or longer drops usually point to missing redirects, lost metadata, blocked indexing or slower pages.
Compare your before-and-after data page by page. A disciplined Wix to WordPress migration process always captures a baseline first, because without one it is impossible to tell normal movement from real losses.
Recover first the pages that brought leads or revenue, then work through the rest.
✧ Plugin issues
Too many plugins, or plugins that conflict, can slow the site or break features.
Choose actively maintained plugins with good reviews, test each one on staging and remove anything unused. One well-built plugin is better than three that overlap.
✧ Website downtime
Downtime usually happens at the DNS switch or when a missed configuration step appears on launch day.
Build and test everything on staging first, lower DNS TTL values a day before launch, switch during a low-traffic window and keep the Wix site active as a fallback until the new site is confirmed stable.
Businesses that compare the top WordPress development companies in India often look at exactly these points: how a team prevents downtime, how it tests redirects and how it handles post-launch issues. These answers reveal more about a partner’s experience than a portfolio alone.
Good Wix to WordPress migration services should also include a written post-launch plan, so problems found in the first weeks are fixed quickly instead of waiting in a support queue.
Also read: 20 WordPress Security Tips to Protect Your Business Website
What to Do After Wix to WordPress Migration
Launch day is a milestone, not the finish line. The final Wix to WordPress migration steps happen after go-live, when real visitors and search engines start using the new site.
The first eight to twelve weeks decide whether the migration fully preserves your traffic and leads.
✧ Submit the updated XML sitemap
Add the new sitemap in Google Search Console and Bing Webmaster Tools. Verify both the domain property and the HTTPS version so you see complete data.
✧ Check indexing and crawl errors
Use the URL Inspection tool on your most important pages to confirm Google can crawl and index them. Review crawl errors weekly and fix them in order of business impact.
✧ Monitor traffic and rankings
Compare organic sessions, conversions and key rankings against your pre-migration baseline. Track a short list of priority keywords and pages rather than trying to watch everything.
✧ Test forms and integrations
Repeat your form tests after launch on the live domain. Confirm that leads arrive in your CRM, email notifications work and analytics events fire correctly.
✧ Set up regular backups
Schedule automatic daily backups stored off the main server. Test a restore at least once so you know the backups work when you need them.
✧ Check website speed and performance
Run PageSpeed Insights on key templates and watch the Core Web Vitals report in Search Console as field data builds up. Address slow pages with caching, image optimisation and theme or plugin changes.
Many businesses keep the same team that handled their Wix migration to WordPress on a maintenance retainer, whether that is an in-house developer, a local agency or a WordPress development agency in India. Continuity helps, because that team already knows how the site was built.
Finally, put a maintenance plan in place. WordPress core, themes and plugins need regular updates, and a site that is updated and monitored stays fast and secure long after the migration project closes.

Ready to Migrate Your Wix Website to WordPress?
A Wix migration to WordPress gives your business more control over design, SEO, integrations and hosting, provided the move is planned and executed carefully.
Whether you run a small brochure site, a content-heavy blog or a site with bookings and online sales, the right migration approach moves your content safely and keeps your search visibility intact.
Use this Wix to WordPress migration guide as a checklist, and compare how the top WordPress development companies in India and local agencies would approach your specific site before you choose.
Rather than rushing to rebuild, invest time in a content inventory, a complete redirect map and thorough testing. These steps protect the traffic and leads you have already earned.
A successful migration combines careful content transfer, preserved URLs and metadata, permanent redirects, a fast and responsive theme and close monitoring after launch.
Partnering with an experienced WordPress development services company can help you plan the migration, move your content and data securely and set up a site that supports your long-term growth.
By choosing the right migration approach, businesses can move to WordPress without losing rankings, leads or valuable content along the way.
Key-Takeaways
- Understand Wix to WordPress Migration: Learn what the migration involves, including hosting setup, content transfer, design rebuilding, SEO configuration and website testing.
- Explore the Benefits of WordPress: Discover how WordPress offers greater customisation, better SEO control, flexible integrations, scalability and hosting ownership.
- Follow the Step-by-Step Migration Process: Explore the 10 essential steps, from backing up your Wix website and transferring content to setting up redirects and launching WordPress.
- Protect Your SEO Rankings: Preserve important URLs, retain metadata, implement 301 redirects, update internal links and monitor performance through Google Search Console.
- Ensure a Smooth Post-Migration Experience: Address common migration challenges, test website functionality, monitor traffic, maintain backups and optimise performance for long-term growth.